
Last time we figured out how to make a basic prototype card. In this post we’ll industrialize it a little by showing how to make many, many cards with minimal typing.
Where we were
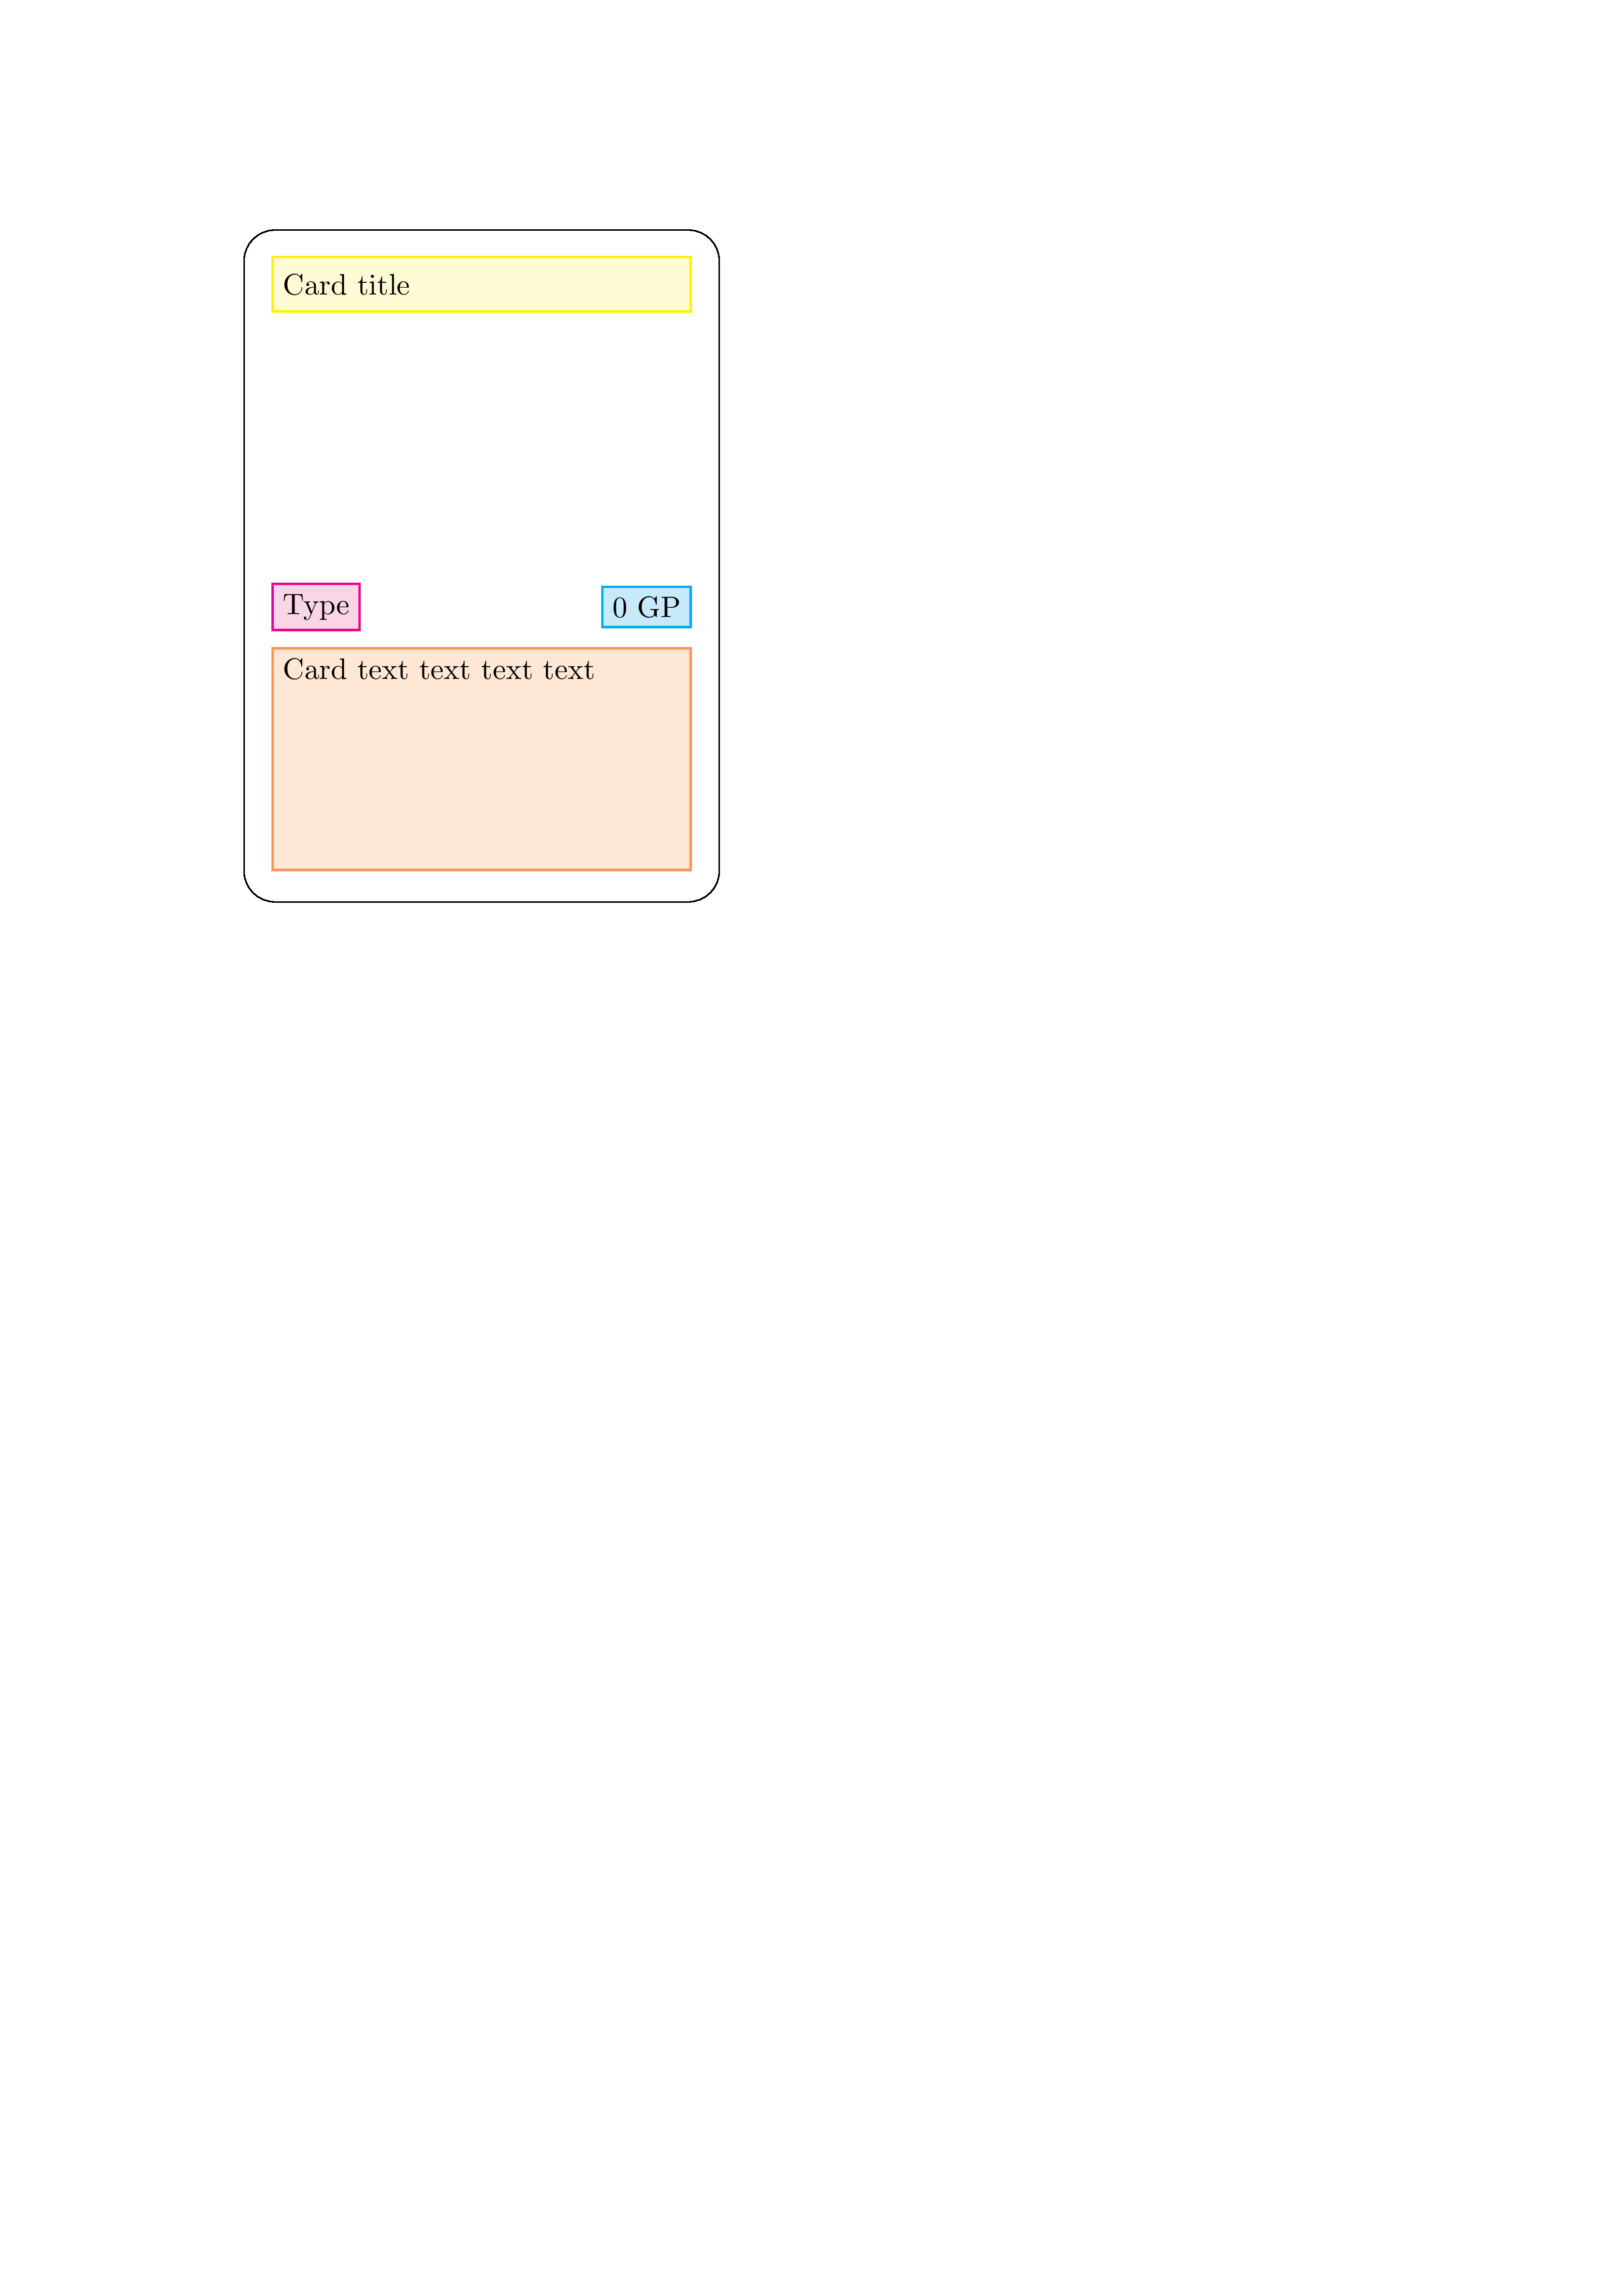
Previously we had this as our card template:
\begin{tikzpicture}

\draw[rounded corners=4mm] (0,0) rectangle (2.5in - 2mm, 3.5in - 2mm);

\node (title) at (1.25in - 1mm, 3.5in - 9mm) [ fill=yellow!20, draw=yellow, thick, text width = 2.5in - 12mm, minimum height = 7mm] {Card title};

\node (text) [ fill=Peach!20, draw=Peach, thick, below left = 2in + 7mm and 0mm of title,
    anchor=west, text width=2.5in -12mm, text depth =1in -2mm] {Card text text text text};

\node (value) [ fill=cyan!20, draw=cyan, thick, below right = 1.5in and 0mm of title,
    anchor=east] { 0 GP };

\node (type) [ fill=Magenta!20, draw=Magenta, thick, below left = 1.5in and 0mm of title,
    anchor=west] { Type };

\end{tikzpicture}
And it looked like this:
Standardising lengths
If we look at that code, we notice there are a lot of magic numbers - measurements that should mean something but we don’t have the context. Let’s replace them with functions.
We first define the measurements (put this in the LaTeX preamble before the \begin{document}):
\newcommand{\cardmargin}{2mm}
\newcommand{\cardroundingradius}{4mm}
\newcommand{\cardwidth}{2.5in}
\newcommand{\cardheight}{3.5in}
\newcommand{\cardimageheight}{2in}
\newcommand{\cardtextboxheight}{1in}
\newcommand{\cardsubvaluesheight}{1.5in}
\newcommand{\cardboxpadding}{1mm}
\newcommand{\cardtitletextheight}{7mm}
We now replace them in the code:
\begin{tikzpicture}

\draw[rounded corners=\cardroundingradius] (0,0) rectangle
    (\cardwidth - \cardmargin, \cardheight - \cardmargin);

\node (title) at (0.5 * \cardwidth - \cardboxpadding, \cardheight -
    2*\cardroundingradius - \cardboxpadding)
    [ fill=yellow!20, draw=yellow, thick,
    text width = \cardwidth - 2*(\cardmargin + \cardroundingradius),
    minimum height = \cardtitletextheight]
    {Card title};

\node (text)
    [ fill=Peach!20, draw=Peach, thick,
    below left = \cardimageheight + \cardtitletextheight and 0mm of title,
    anchor = west,
    text width = \cardwidth -2*(\cardmargin + \cardroundingradius), text
    depth = \cardtextboxheight -2*\cardboxpadding]
    {Card text text text text};

\node (value)
    [ fill=cyan!20, draw=cyan, thick,
    below right = \cardsubvaluesheight and 0mm of title, anchor = east]
    { 0 GP };

\node (type)
    [ fill=Magenta!20, draw=Magenta, thick,
    below left = \cardsubvaluesheight and 0mm of title, anchor = west]
    { Type };

\end{tikzpicture}
Note that you can do some basic measurement arithmetic if you need to. Be careful with it - I’ve found it a little sensitive.
Feel free to clean up this example more so you get the specific context of each measurement or more control.
Standardising colours
We can do the same for colours:
\newcommand{\cardtitlecolour}{yellow}
\newcommand{\cardtextboxcolour}{Peach}
\newcommand{\cardvaluecolour}{cyan}
\newcommand{\cardtypecolour}{Magenta}

::latex
\begin{tikzpicture}

\draw[rounded corners=\cardroundingradius] (0,0) rectangle
    (\cardwidth - \cardmargin, \cardheight - \cardmargin);

\node (title) at (0.5 * \cardwidth - \cardboxpadding, \cardheight -
    2*\cardroundingradius - \cardboxpadding)
    [ fill=\cardtitlecolour!20, draw=\cardtitlecolour, thick,
    text width = \cardwidth - 2*(\cardmargin + \cardroundingradius),
    minimum height = \cardtitletextheight]
    {Card title};

\node (text)
    [ fill=\cardtextboxcolour!20, draw=\cardtextboxcolour, thick,
    below left = \cardimageheight + \cardtitletextheight and 0mm of title,
    anchor = west,
    text width = \cardwidth -2*(\cardmargin + \cardroundingradius), text
    depth = \cardtextboxheight -2*\cardboxpadding]
    {Card text text text text};

\node (value)
    [ fill=\cardvaluecolour!20, draw=\cardvaluecolour, thick,
    below right = \cardsubvaluesheight and 0mm of title, anchor = east]
    { 0 GP };

\node (type)
    [ fill=\cardtypecolour!20, draw=\cardtypecolour, thick,
    below left = \cardsubvaluesheight and 0mm of title, anchor = west]
    { Type };

\end{tikzpicture}
Notice in each I’ve used fill=(colour)!20 and then draw=(colour).
This means have 20% of your colour for the fill (so somewhat
transparent) but the original colour for the border. This gives it the
nice contrast. Of course, when you get into designing your cards
properly you’ll want to be more sophisticated.
Templates
So suppose this template is for inventory items in my game. I want a
whole bunch of them but I don’t want to have the whole tikzpicture for
each and every one - partly because of repetition, and partly because I
want to read my cards’ details without all the formatting stuff.
To achieve this, we define yet more functions, but this time we have arguments. Really all we need to do is wrap our template with:
\newcommand{\inventory}[4]{ ...tikz template... }
The [4] means there are four arguments you need to supply. Here it is
in detail (put this code in the preamble):
\newcommand{\inventory}[4]{

    \begin{tikzpicture}

    \draw[rounded corners=\cardroundingradius] (0,0) rectangle
        (\cardwidth - \cardmargin, \cardheight - \cardmargin);

    \node (title) at (0.5 \* \cardwidth - \cardboxpadding, \cardheight -
        2\*\cardroundingradius - \cardboxpadding)
        [ fill=\cardtitlecolour!20, draw=\cardtitlecolour, thick,
        text width = \cardwidth - 2\*(\cardmargin + \cardroundingradius),
        minimum height = \cardtitletextheight]
        {\Large \#1};

    \node (text)
        [ fill=\cardtextboxcolour!20, draw=\cardtextboxcolour, thick,
        below left = \cardimageheight + \cardtitletextheight and 0mm of
        title,
        anchor = west,
        text width = \cardwidth -2\*(\cardmargin + \cardroundingradius), text
        depth = \cardtextboxheight -2\*\cardboxpadding]
        {\#3};

    \node (value)
        [ fill=\cardvaluecolour!20, draw=\cardvaluecolour, thick,
        below right = \cardsubvaluesheight and 0mm of title, anchor = east] {
        \textsc{ \#4 GP} };

    \node (type)
        [ fill=\cardtypecolour!20, draw=\cardtypecolour, thick,
        below left = \cardsubvaluesheight and 0mm of title, anchor = west] {
        \#2 };

    \end{tikzpicture}

}
The arguments are #1 to #4. Why that order? Mostly preference for
how the code works. If I want to make a few items, then I can just write
them as:
\inventory{Brass Key}{Key}{It's a key.}{5}
\inventory{Wine}{Food}{+1 Health}{2}
\inventory{Axe}{Weapon}{+1 Fight}{5}
This is nice and clean. We can add as many cards as we like and not have to worry about the formatting. If you compile the code now, you’ll get three cards, one on each “line”. Here’s the full code so far:
\documentclass[dvipsnames,parskip]{scrartcl}

\usepackage{xcolor}
\usepackage{tikz}
\usetikzlibrary{positioning}

\usepackage{pifont}
\usepackage{graphicx}
\usepackage{etoolbox}
\usepackage[utf8]{inputenc}

\usepackage{multicol}

\usepackage{nopageno}

\newcommand{\cardmargin}{2mm}
\newcommand{\cardroundingradius}{4mm}
\newcommand{\cardwidth}{2.5in}
\newcommand{\cardheight}{3.5in}
\newcommand{\cardimageheight}{2in}
\newcommand{\cardtextboxheight}{1in}
\newcommand{\cardsubvaluesheight}{1.5in}
\newcommand{\cardboxpadding}{1mm}
\newcommand{\cardtitletextheight}{7mm}

\newcommand{\cardtitlecolour}{yellow}
\newcommand{\cardtextboxcolour}{Peach}
\newcommand{\cardvaluecolour}{cyan}
\newcommand{\cardtypecolour}{Magenta}

\newcommand{\inventory}[4]{

\begin{tikzpicture}

\draw[rounded corners=\cardroundingradius] (0,0) rectangle
    (\cardwidth - \cardmargin, \cardheight - \cardmargin);

\node (title) at (0.5 \* \cardwidth - \cardboxpadding, \cardheight -
    2\*\cardroundingradius - \cardboxpadding)
    [ fill=\cardtitlecolour!20, draw=\cardtitlecolour, thick,
    text width = \cardwidth - 2\*(\cardmargin + \cardroundingradius),
    minimum height = \cardtitletextheight]
    {\Large \#1};

\node (text)
    [ fill=\cardtextboxcolour!20, draw=\cardtextboxcolour, thick,
    below left = \cardimageheight + \cardtitletextheight and 0mm of
    title,
    anchor = west,
    text width = \cardwidth -2\*(\cardmargin + \cardroundingradius), text
    depth = \cardtextboxheight -2\*\cardboxpadding]
    {\#3};

\node (value)
    [ fill=\cardvaluecolour!20, draw=\cardvaluecolour, thick,
    below right = \cardsubvaluesheight and 0mm of title, anchor = east]
    { \textsc{ \#4 GP} };

\node (type)
    [ fill=\cardtypecolour!20, draw=\cardtypecolour, thick,
    below left = \cardsubvaluesheight and 0mm of title, anchor = west]
    { \#2 };

\end{tikzpicture}

}

\begin{document}

\thispagestyle{empty}

\inventory{Brass Key}{Key}{It's a key.}{5}
\inventory{Wine}{Food}{+1 Health}{2}
\inventory{Axe}{Weapon}{+1 Fight}{5}

\end{document}
Note that if you want more templates, just repeat this process with new card types. It doesn’t have to have the same formatting elements or number of variables but you can use this existing card type as a foundation.
Optional text
Suppose you have some items that don’t have any gold piece value. You
might not want the card to have 0 GP on it, but you don’t want to have
a similar template for just that type of card. We can optionally have
elements based on whether text exists or not!
Make sure you’ve added the etoolbox package (\usepackage{etoolbox}).
Now instead of the value node’s text we write:
...

\node (value)
    [ fill=cyan!20, draw=cyan, thick,
    below right = \cardsubvaluesheight and 0mm of title, anchor = east]
    { \ifstrempty{\#4}{}{\textsc{\#4 GP}} };

...
The relevant part is the last line \ifstrempty{#4}{}{\textsc{#4 GP}}, which means:
- If the string (
#4) is empty:- Write nothing in the text box
- Otherwise
- Write
#4 GPin small-caps text.
- Write
Now if write our brass key like:
\inventory{Brass Key}{Key}{It's a key.}{}
Then there’ll be no text whatsoever in the box. You might object to there being a little box remaining. You might like this as part of the prototype phase, or you might want to omit it completely. If the latter, we just put the entire node into the conditional code:
\ifstrempty{\#4}{}{
    \node (value)
    [ fill=cyan!20, draw=cyan, thick,
    below right = \cardsubvaluesheight and 0mm of title, anchor = east] {
    \textsc{\#4 GP} };
}
This removes the cyan box if there’s no value provided.
As a final note on optional text, you need to make sure if you want to leave an element out, you need to make that variable empty. A single space will mess this up. You can get around this, but it’s much more coding.
Standard stylings
You may have certain mechanical phrases in your cards that you want to be emphasised but done so in a standardised way. For example, in my game I have challenges of different kinds of certain difficulties. This is the core of the game so I want them to be easily recognized. I do this by writing them as Body (7) for a difficulty-level 7 Body challenge.
Again, we use commands to achieve this. For example:
\newcommand{\Body}[1]{\textbf{Body\~(\#1)}}
This takes a single argument (the difficulty level) and consistently
formats it as bold, and puts a nonbreaking space (~) in between it and
the text. This latter bit is so linebreaks don’t mess with our consistency.
I can make these for any sort of challenge I like, as well as success or fail conditions. For example, an action card will look like:
\rescue{Drunken Orc}{\Sneak{6}. \Fail{Lose 1 health.}}
This looks like:
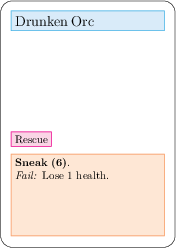
The fail condition is on its own line and formatted correctly with:
\newcommand{\Fail}[1]{\par \textit{Fail:} \#1}
I’d very much recommend this approach so you have a consistent style. If
there are particular instances where you need to mess with the
formatting, then either do so within the already-existing framework (I
occasionally have long titles within a \small{title}) or warily put in
manual formatting.
Card counting
As a nice treat, we’ll finish with a little trick to get counts for each of your different kind of card. For example, how many inventory, attack and defend cards do I have?
It’s easy! In the preamble, create some new counters:
% Counters
\newcounter{InvCounter}
\newcounter{AttackCounter}
\newcounter{DefendCounter}
Then inside the command for your card template, add
\stepcounter{InvCounter} (or relevant counter). This means every
time you create a new card, it’ll step that counter one. The counter
starts from zero, so the final result is how many cards you have!
Then in a separate part of the document, you can just call the counters:
\section{Card counts}

\begin{itemize}
\item \theInvCounter{} Inventory cards
\item \theAttackCounter{} Attack cards
\item \theDefendCounter{} Defend cards
\end{itemize}
Note that you get the counter value by adding the to the start. You
can even use this inside your card design and have tiny card reference
numbers like many Collectible Card Games do.
Next time
We’ll finish with some methods to put your cards into card sheets, or resize the page to get one card per page at the right size. We’ll also look at converting your PDFs into PNGs so you can upload them to a card printer.