
Last time (a long time ago!) we had worked out a way to write many cards cleanly and efficiently, whilst maintaining a consistent style. By now you’ll be keen to print out your cards for quick prototyping, or make the step towards printing cards at a publisher like The Game Crafter.
We’ll look at a way to turn each LaTeX card into a PDF of the right shape and format for printing, as well as making card sheets for our own prototyping.
Code recap
For reference, here’s the code where we were up to last time:
\documentclass[dvipsnames,parskip]{scrartcl}

% Colour and design packages
\usepackage{xcolor}
\usepackage{tikz}
\usetikzlibrary{positioning}

\usepackage{pifont}
\usepackage{graphicx}
\usepackage{etoolbox}
\usepackage[utf8]{inputenc}

% To make sure we don't have page numbers.
\usepackage{nopageno}

% Our consistent sizing
\newcommand{\cardmargin}{2mm}
\newcommand{\cardroundingradius}{4mm}
\newcommand{\cardwidth}{2.5in}
\newcommand{\cardheight}{3.5in}
\newcommand{\cardimageheight}{2in}
\newcommand{\cardtextboxheight}{1in}
\newcommand{\cardsubvaluesheight}{1.5in}
\newcommand{\cardboxpadding}{1mm}
\newcommand{\cardtitletextheight}{7mm}

% Our consistent colours
\newcommand{\cardtitlecolour}{yellow}
\newcommand{\cardtextboxcolour}{Peach}
\newcommand{\cardvaluecolour}{cyan}
\newcommand{\cardtypecolour}{Magenta}

% Our card template
\newcommand{\inventory}[4]{

\begin{tikzpicture}

\draw[rounded corners=\cardroundingradius] (0,0) rectangle
    (\cardwidth - \cardmargin, \cardheight - \cardmargin);

\node (title) at (0.5 * \cardwidth - \cardboxpadding, \cardheight -
    2*\cardroundingradius - \cardboxpadding)
    [ fill=\cardtitlecolour!20, draw=\cardtitlecolour, thick,
    text width = \cardwidth - 2*(\cardmargin + \cardroundingradius),
    minimum height = \cardtitletextheight]
    {\Large \#1};

\node (text)
    [ fill=\cardtextboxcolour!20, draw=\cardtextboxcolour, thick,
    below left = \cardimageheight + \cardtitletextheight and 0mm of
    title,
    anchor = west,
    text width = \cardwidth -2*(\cardmargin + \cardroundingradius), text
    depth = \cardtextboxheight -2*\cardboxpadding]
    {\#3};

\node (value)
    [ fill=\cardvaluecolour!20, draw=\cardvaluecolour, thick,
    below right = \cardsubvaluesheight and 0mm of title, anchor = east]
    { \textsc{ \#4 GP} };

\node (type)
    [ fill=\cardtypecolour!20, draw=\cardtypecolour, thick,
    below left = \cardsubvaluesheight and 0mm of title, anchor = west]
    { \#2 };

\end{tikzpicture}

}

\begin{document}

\thispagestyle{empty}

% Some sample cards
\inventory{Brass Key}{Key}{It's a key.}{5}
\inventory{Wine}{Food}{+1 Health}{2}
\inventory{Axe}{Weapon}{+1 Fight}{5}

\end{document}
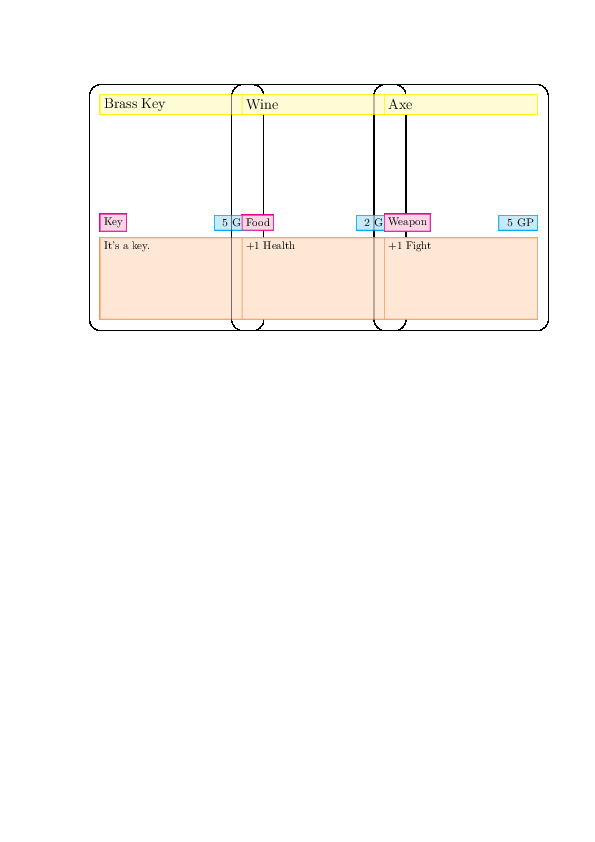
This ends up with a PDF with two cards per page and a lot of wasted space. Our two methods in this post fix this by either cutting the page down to exactly one card per page (and have the page the right size), or squish more cards onto a page.
Throughout this series we’ve assumed poker-sized cards (2.5” x 3.5”). If you’re looking at different-sized cards, just change the \cardwidth and \cardheight in the preamble to the correct dimensions.
Card sheets
Card sheets are a way of arranging cards into an array on your page. This lets you view more cards at once in case you want to get a sense of the cards’ graphic design across the deck. If you’re prototyping your own cards, it also gives you a way to easily guillotine a standard page into cards with reduced wastage.
Luckily this is not too hard in LaTeX. We first import the multicol package which does multi-columnar arrays:
\usepackage{multicol}
If we surround our card declarations with the proper environment, we’ll get arrays of 3 cards per row.
\begin{multicols}[3}
\inventory{Brass Key}{Key}{It's a key.}{5}
\inventory{Wine}{Food}{+1 Health}{2}
\inventory{Axe}{Weapon}{+1 Fight}{5}
\end{multicols}
Unfortunately if you compile this as a PDF, the cards will all be overlapping. If you read the LaTeX compile log, you’ll see why:
Overfull \hbox (17.92183pt too wide) in paragraph at lines 72--72
[][]

Overfull \hbox (17.92183pt too wide) in paragraph at lines 73--73
[][]

Overfull \hbox (17.92183pt too wide) in paragraph at lines 74--74
[][]
This means the line is too short for 3 cards to sit comfortably. But you’ll notice there’s a gigantic, uneven margin which we don’t need.
We use the geometry package to change the margins. Put this in the preamble:
\usepackage[margin=0.5in]{geometry}
I’ve reduced the margins to 0.5 inches on all sides. This lets three 2.5” x 3.5” poker cards sit per row on an A4 sheet of paper. If you use different-sized paper, then you may need to fiddle with the numbers. You can also save a little bit of time and set the margins to 0 so you don’t need to guillotine all the edges off.
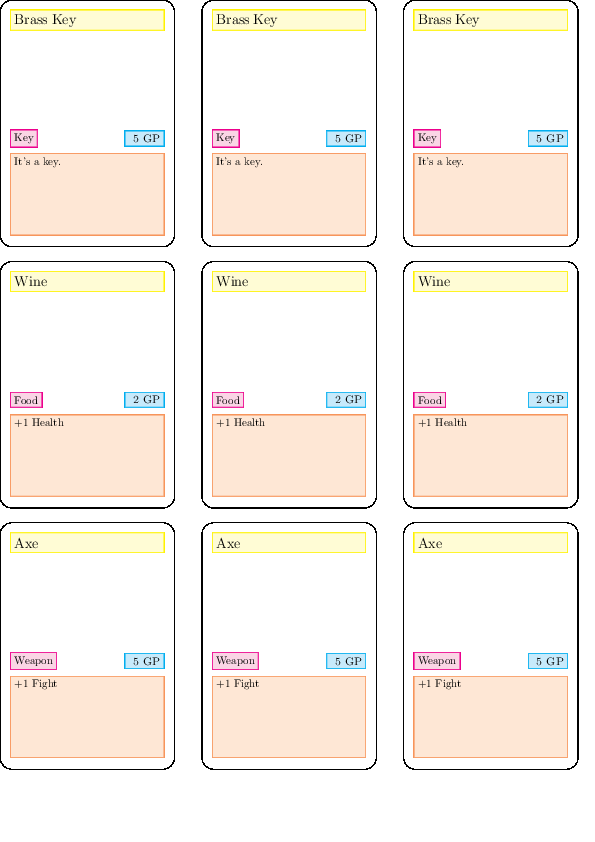
If you have too many cards for one page, it’ll nicely just continue on the next page.
If you want an tight layout, you need to remove the column separators, reduce the paragraph spacing and set the margins so that they are exactly the width of the paper minus your cards (for A4 the width is 21mm so subtracting three 2.5” wide cards gives a margin of 0.975cm each side):
\documentclass[dvipsnames,parskip,a4paper]{scrartcl}

% ...
\usepackage[margin=0.975cm]{geometry}

\setlength{\columnsep}{0mm}
\setlength{\parskip}{0mm}
Unfortunately to get an ultra-tight layout, you need to arrange things yourself with tikz. As they are, cards are big boxes followed by a space. If you remove the space, they stick together and overfill boxes. I found that the effort in wrestling with LaTeX was more than the time required to guillotine a little bit more.
Individual cards
If you are using something like The Game Crafter, you need to supply your cards as individual PNGs. They offer a variety of templates if you are doing manual graphic design. Since we’re automating our process, we need to be able to output PNG files of the right size.
First up we need an easy way to make our cards take up exactly one page per card. What we’ll do is say “whenever you see a tikzpicture environment, make it a page”. A little hacky, but it works in two lines:
\RequirePackage[active,tightpage]{preview}
\PreviewEnvironment{tikzpicture}
The PDF output will be one card per page, and if you look at document properties, the pages will be of the right size (2.5”x3.5”). You don’t even need to unset all your multi-columns or page margins.
If you look at the Game Crafter template, they have a few printing areas that you need to consider. There’s:
- the safe zone, where text or images definitely won’t get trimmed by the card-cutting process
- the trim line, where the card should be cut
- the bleed zone, which is area to be trimmed but still printed on. This is so your colour goes all the way to the edge.
Our cards currently draw the trim line. We need to expand the template to include the 1/8” bleed zone.
If we want a white bleed zone, then we can use:
\setlength{\PreviewBorder}{0.125in}
This automatically adds a 1/8” border around your image by hijacking how the PreviewEnvironment looks.
Unfortunately if we want to have our design bleed all the way to the edge - say if you had a colour or image background - then we need to monkey with the template. This is because the earlier design uses a mix of absolute placement. This version tries to align to the card corners, whilst maintaining the bleed area.
\newcommand{\cardroundingradius}{4mm}
\newcommand{\bleedwidth}{0.125in}
\newcommand{\cardwidth}{2.5in}
\newcommand{\cardheight}{3.5in}
\newcommand{\cardtextboxheight}{1in}
\newcommand{\cardinnerpadding}{0.5*\cardroundingradius}
\newcommand{\cardboxpadding}{1mm}
\newcommand{\cardtitletextheight}{7mm}
\newcommand{\cardvaluewidth}{4em}
\newcommand{\cardvalueheight}{10pt}
\newcommand{\cardtextinnersep}{2mm}

\newcommand{\cardtitlecolour}{yellow}
\newcommand{\cardtextboxcolour}{Peach}
\newcommand{\cardvaluecolour}{cyan}
\newcommand{\cardtypecolour}{Magenta}

\newcommand{\inventory}[4]{\begin{tikzpicture}

\draw (0,0) rectangle (\cardwidth + 2* \bleedwidth, \cardheight +
    2*\bleedwidth );

\node (card) at (\bleedwidth, \bleedwidth)
    [draw,
    rounded corners=\cardroundingradius,
    minimum width=\cardwidth,
    minimum height=\cardheight,
    anchor=south west
    ] {};

\node (title)
    [fill=\cardtitlecolour!20, draw=\cardtitlecolour, thick,
    minimum width=\cardwidth - 2*\cardroundingradius,
    text width=\cardwidth - 2*\cardroundingradius -
    2*\cardtextinnersep,
    inner xsep=\cardtextinnersep,
    minimum height=\cardtitletextheight,
    below right=\cardroundingradius and \cardroundingradius of card.north west,
    anchor=north west] { \Large{\#1} };

\node (text)
    [fill=\cardtextboxcolour!20, draw=\cardtextboxcolour, thick,
    minimum width=\cardwidth - 2*\cardroundingradius,
    text width=\cardwidth - 2*\cardroundingradius
    -2*\cardtextinnersep,
    inner sep=\cardtextinnersep,
    minimum height=\cardtextboxheight,
    text depth=\cardtextboxheight -2*\cardtextinnersep,
    above right=\cardroundingradius + \cardtextboxheight +
    \cardtextinnersep and \cardroundingradius of card.south west,
    anchor=north west] { \#3 };

\node (value)
    [fill=\cardvaluecolour!20, draw=\cardvaluecolour, thick,
    above=\cardinnerpadding of text.north east,
    anchor=south east,
    inner sep=\cardtextinnersep,
    minimum height=\cardvalueheight,
    text depth=\cardvalueheight - 2*\cardtextinnersep] {
    \ifstrempty{\#4}{}{\textsc{\#4 gp}} };

\node (type)
    [fill=\cardtypecolour!20, draw=\cardtypecolour, thick,
    above=\cardinnerpadding of text.north west,
    anchor=south west,
    inner sep=\cardtextinnersep,
    minimum height=\cardvalueheight,
    text depth=\cardvalueheight - 2*\cardtextinnersep] { \#2 };

\end{tikzpicture}}
Which looks like:
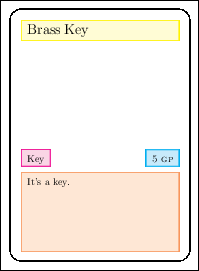
We now just need to turn it into a bunch of PNGs with ImageMagick. The appropriate incantation is:
convert -density 300 card.pdf -alpha off card-%02d.png
Step by step this means:
- -density 300
- Interpret the next file as being 300 DPI instead of the default 72 DPI. This is the recommended resolution by GameCrafter.
- card.pdf
- The input PDF.
- -alpha off
- Turn off the alpha transparency
- card-%02d.png
- Create the cards, one per page in the PDF, saving them to card-01.png, card-02.png, …, card-99.png
Next steps
We’ve put together a rough template for a card game prototype. After you’re playtested your game, you’ll want to design the cards properly. This can all still be done in LaTeX, following the steps above. It’ll be different, of course, based on your design.
You’ll tend to want to have the actual card area be borderless, due to drifts in printing. Either have a large image or a flat colour that extends beyond the borders.
You can use fancy fonts for your text. See here for a general tutorial, and here for a catalogue of interest LaTeX fonts.
If you want to make sure your colours come out accurately, you need to worry about colour spaces. This is a complicated affair, but you can get some ways there with letting xcolor know. Typically you want to design in CMYK and then convert to RGB for Game Crafter.
\usepackage[cmyk]{xcolor}
You can get the colour profiles Game Crafter uses, and then let Imagemagick know about them during conversion:
convert -density 300 card.pdf -alpha off -profile AdobeRGB.icc card-%02d.png
where the original PDF is in CMYK mode and the above line converts it to the Adobe RGB mode.
Wrap up
It’s been a long while between posts, but hopefully this has been useful. If you have any questions, comments or suggestions, let me know in the comments below or via email. If you make a game with this approach, I’d love to see it!